Introducing the most powerful tool to create, share and practice Networking Lab with multi-vendors.
Step 01
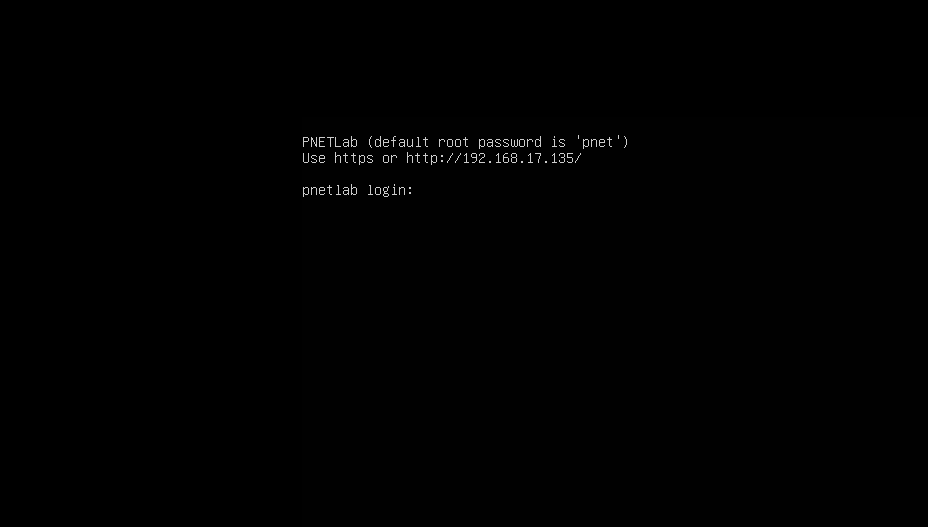
Download and Deploy
Step 02
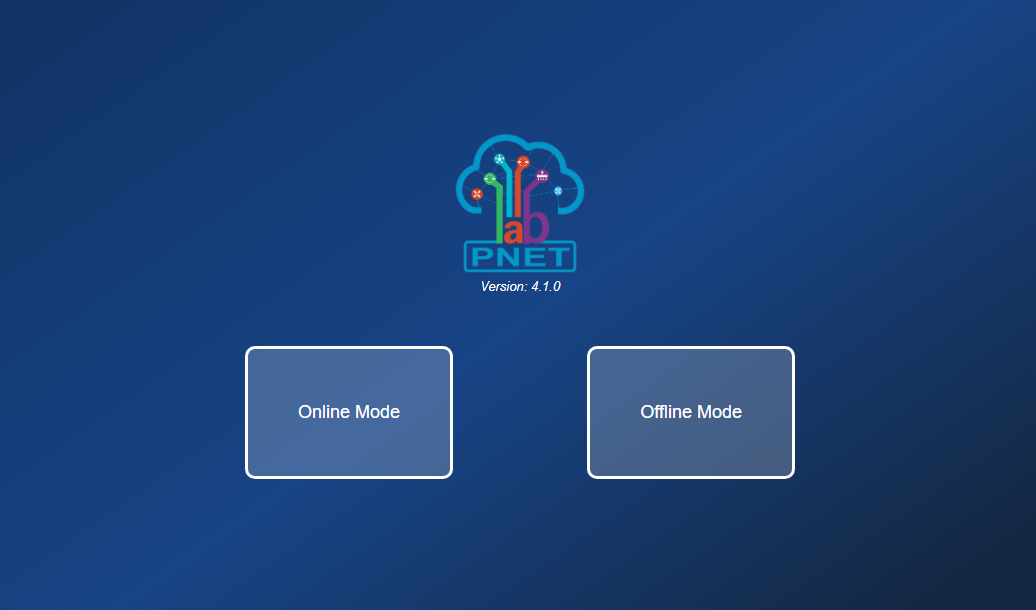
Register and Login
Step 03
Go to store
Step 04
Get Lab and Learn
Step 01
Download the .ova file and deploy on virtualization platforms such as VirtualBox, VMWare,...
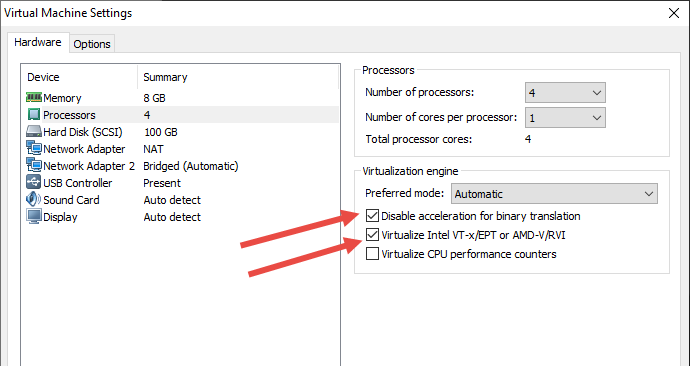
Enable virtualization on Vmware
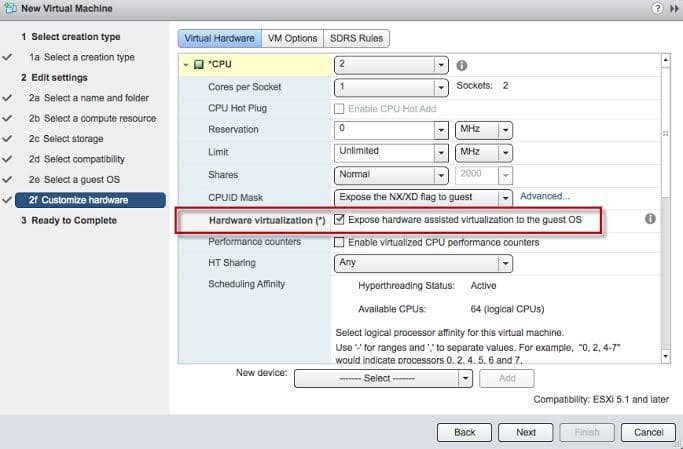
Enable virtualization on ESXI
Link Download | MD5 Checksum | Size |
|---|---|---|
| 2G | |
| 2G | |
| 2G | |
|
|
|
Note
- You must enable Virtualization to run Qemu Node.
- You have to make sure Virtualization is enabled in your BIOS
- If Virtualization is not enabled you will meet this warning on the console screen: WARNING: neither Intel VT-x or AMD-V found
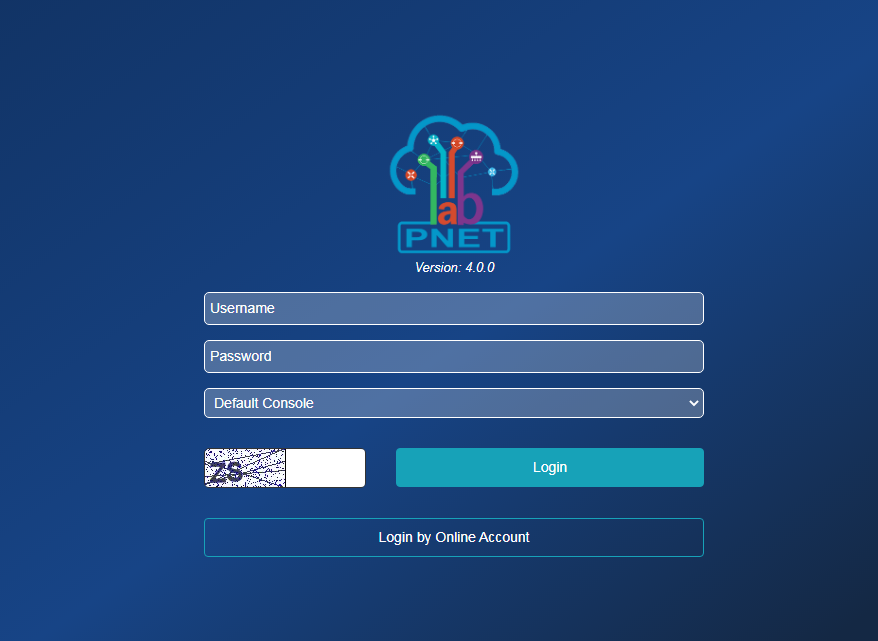
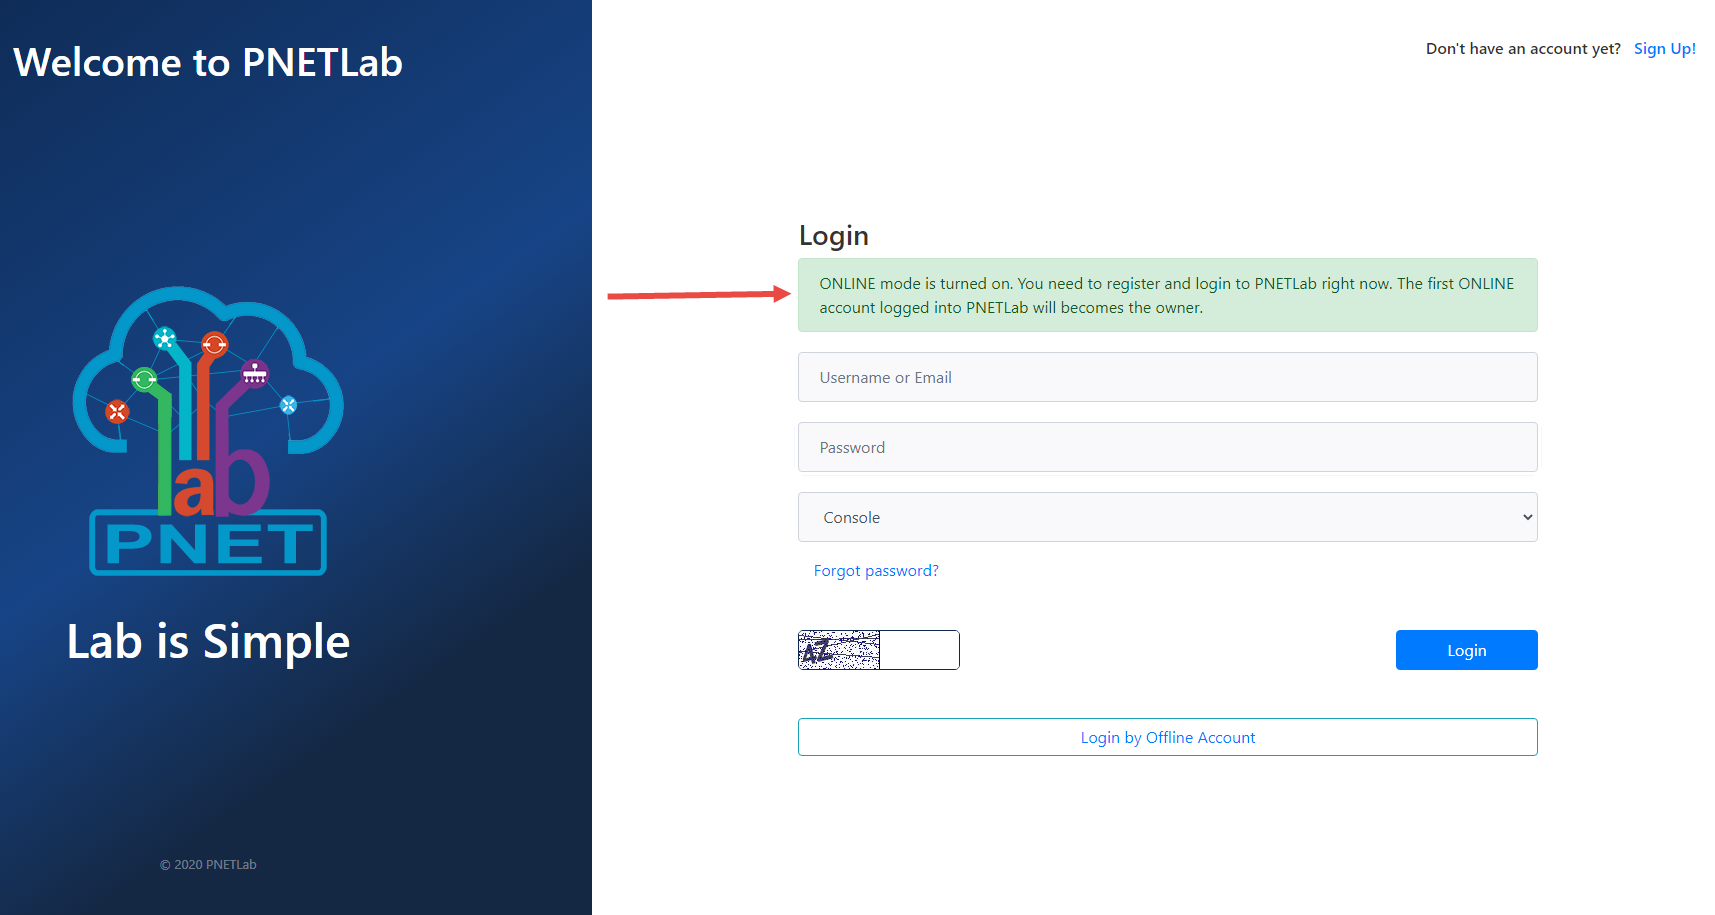
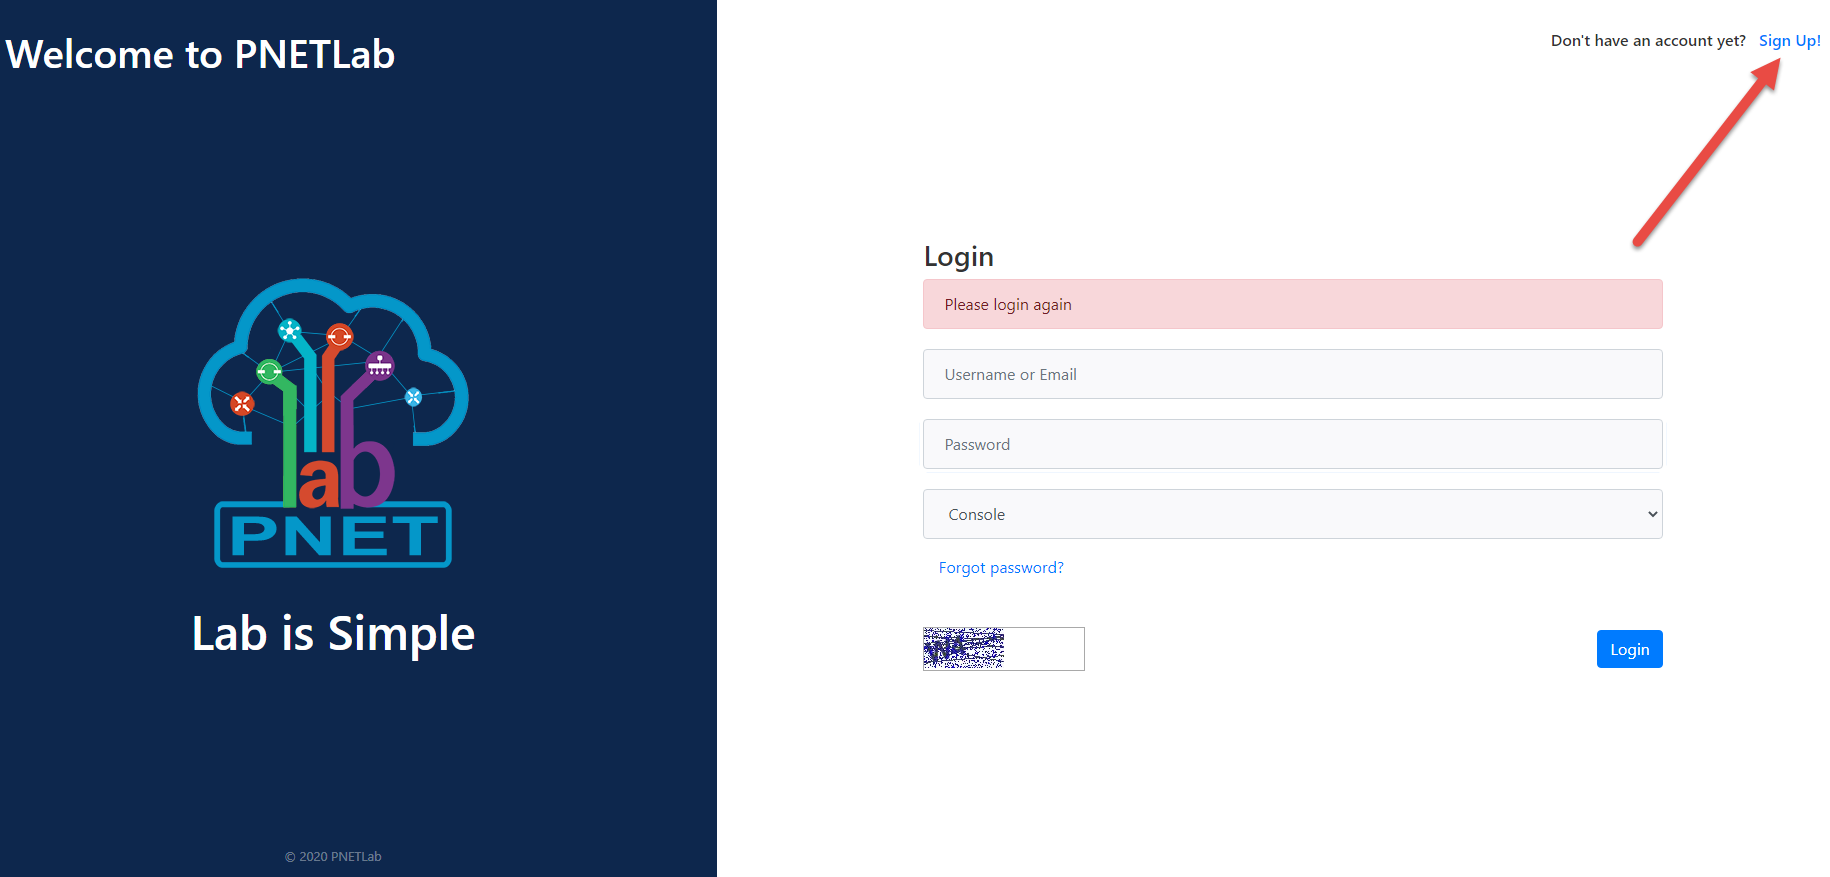
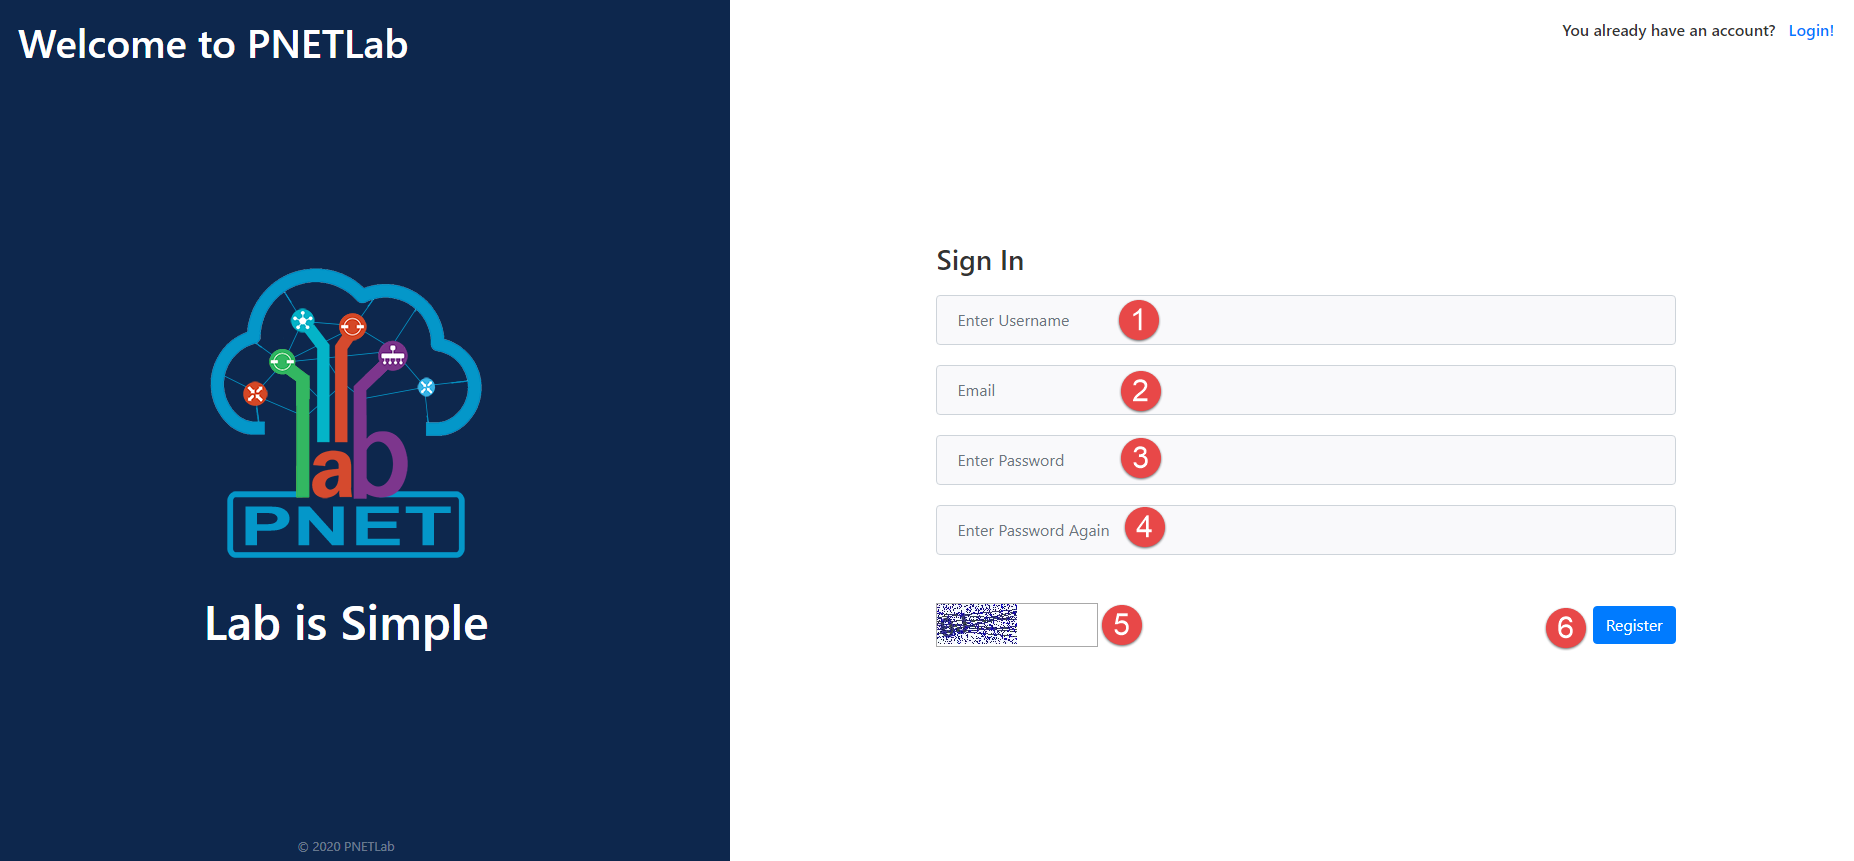
Step 02: Register and Login
- To check internet connection run commands: ping pnetlab.com; ping user.pnetlab.com, ping uploader.pnetlab.com, ping docker.io
- In case you can not ping to internet, please try:
- Reset network adapter of virtualization platform (Vmware: Edit > Virtual network Editor > Restore Default)
- Disable then enable virtual network card on your window (Vmware: vmnet 1 and vmnet 8)
- Use only one virtualization platform (Vmware: uninstall virtualbox or hyper-v)
Note:
There are two options, you can log in: Online and Offline mode (for more detail you can check this link: https://pnetlab.com/pages/documentation?slug=system-mode-in-pnetlab)
Offline Mode:
- Don't need internet to work
- Don't need to register. Login by default account: admin/pnet
- Support full functions of PNETLab
- You can only download and use Open Labs (The Labs with "Open" in the top) on the Store
- You can not share or sell lab to the Store
- Limit 10 accounts (Can be upgraded but require internet)
Online Mode
- Need internet to work
- Need to register.
- Support full functions of PNETLab
- You can download and use all Labs on the Store
- You can share or sell lab to the Store
- Limit 10 accounts (Can be upgraded)

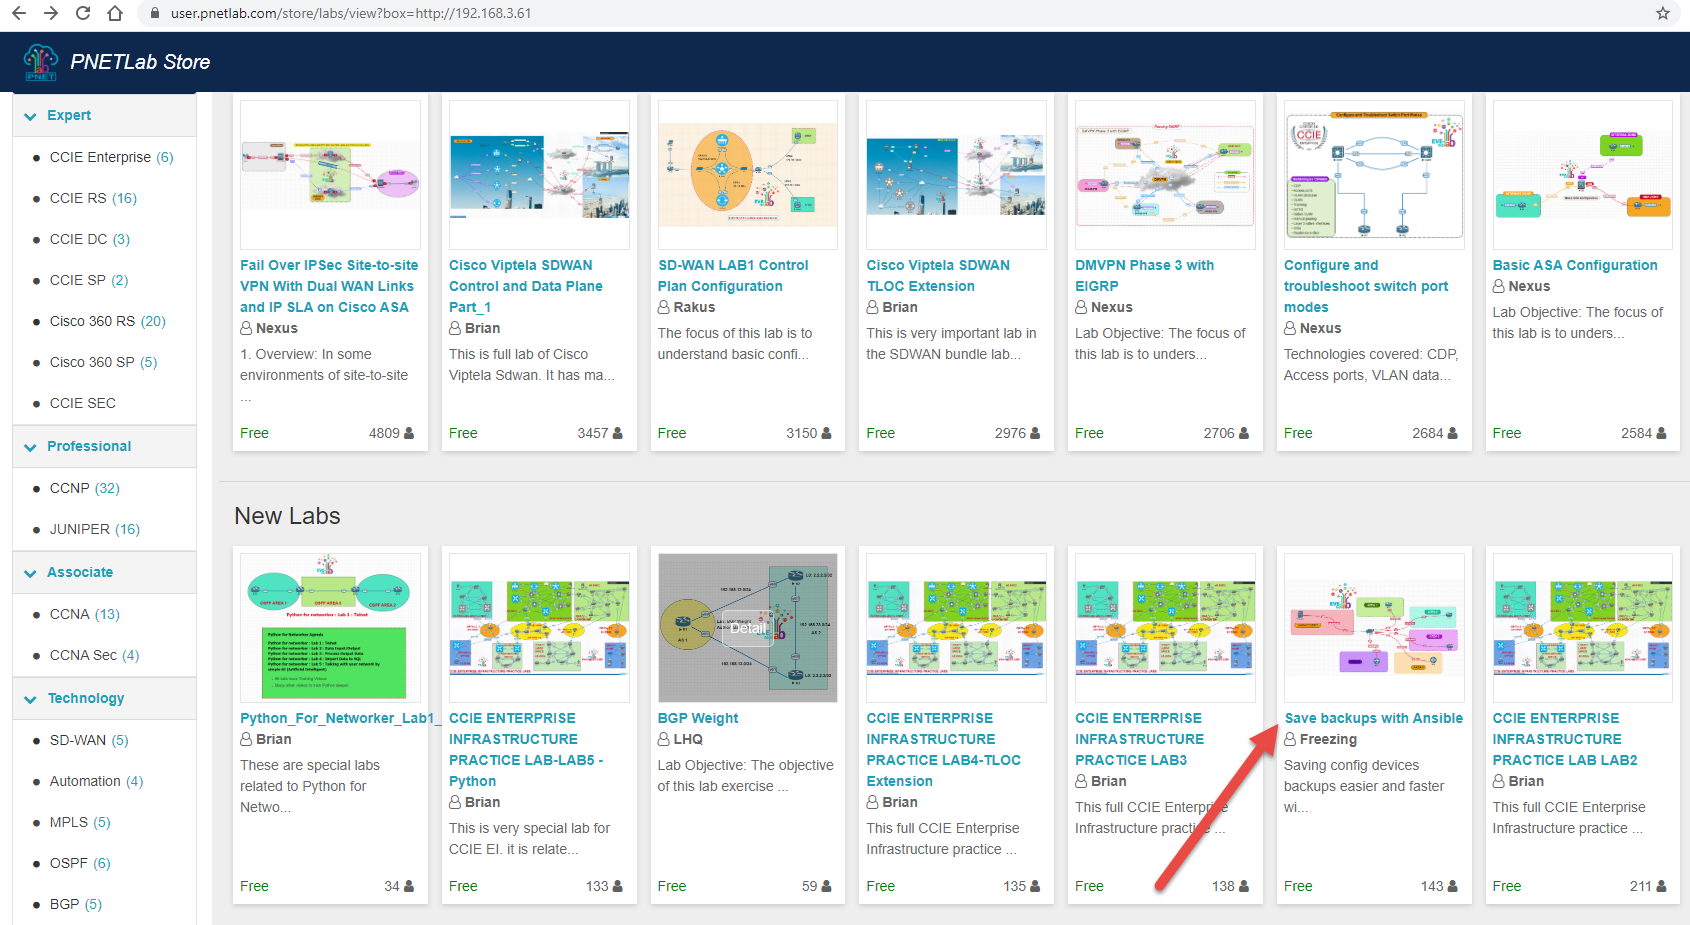
Step 03: Go to Store
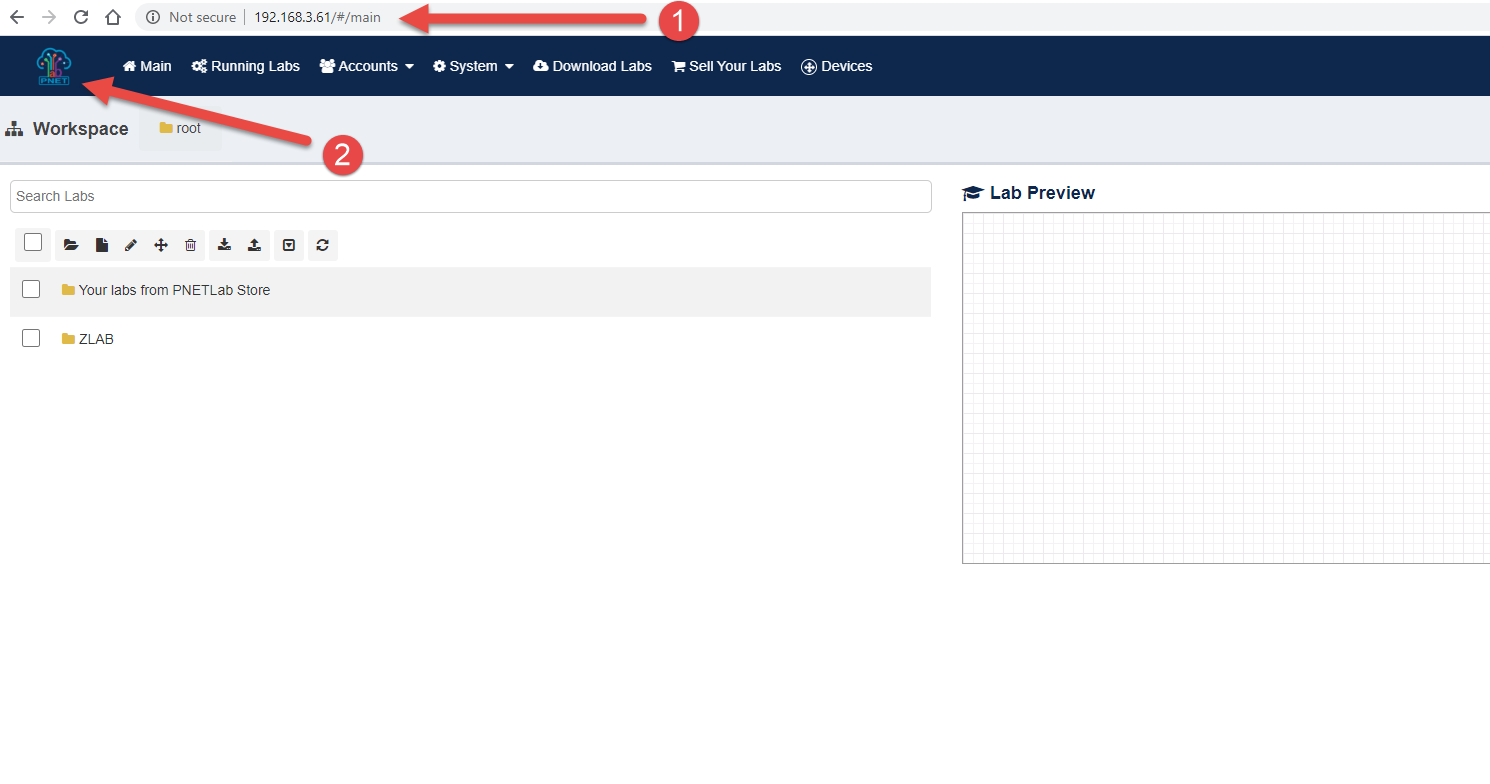
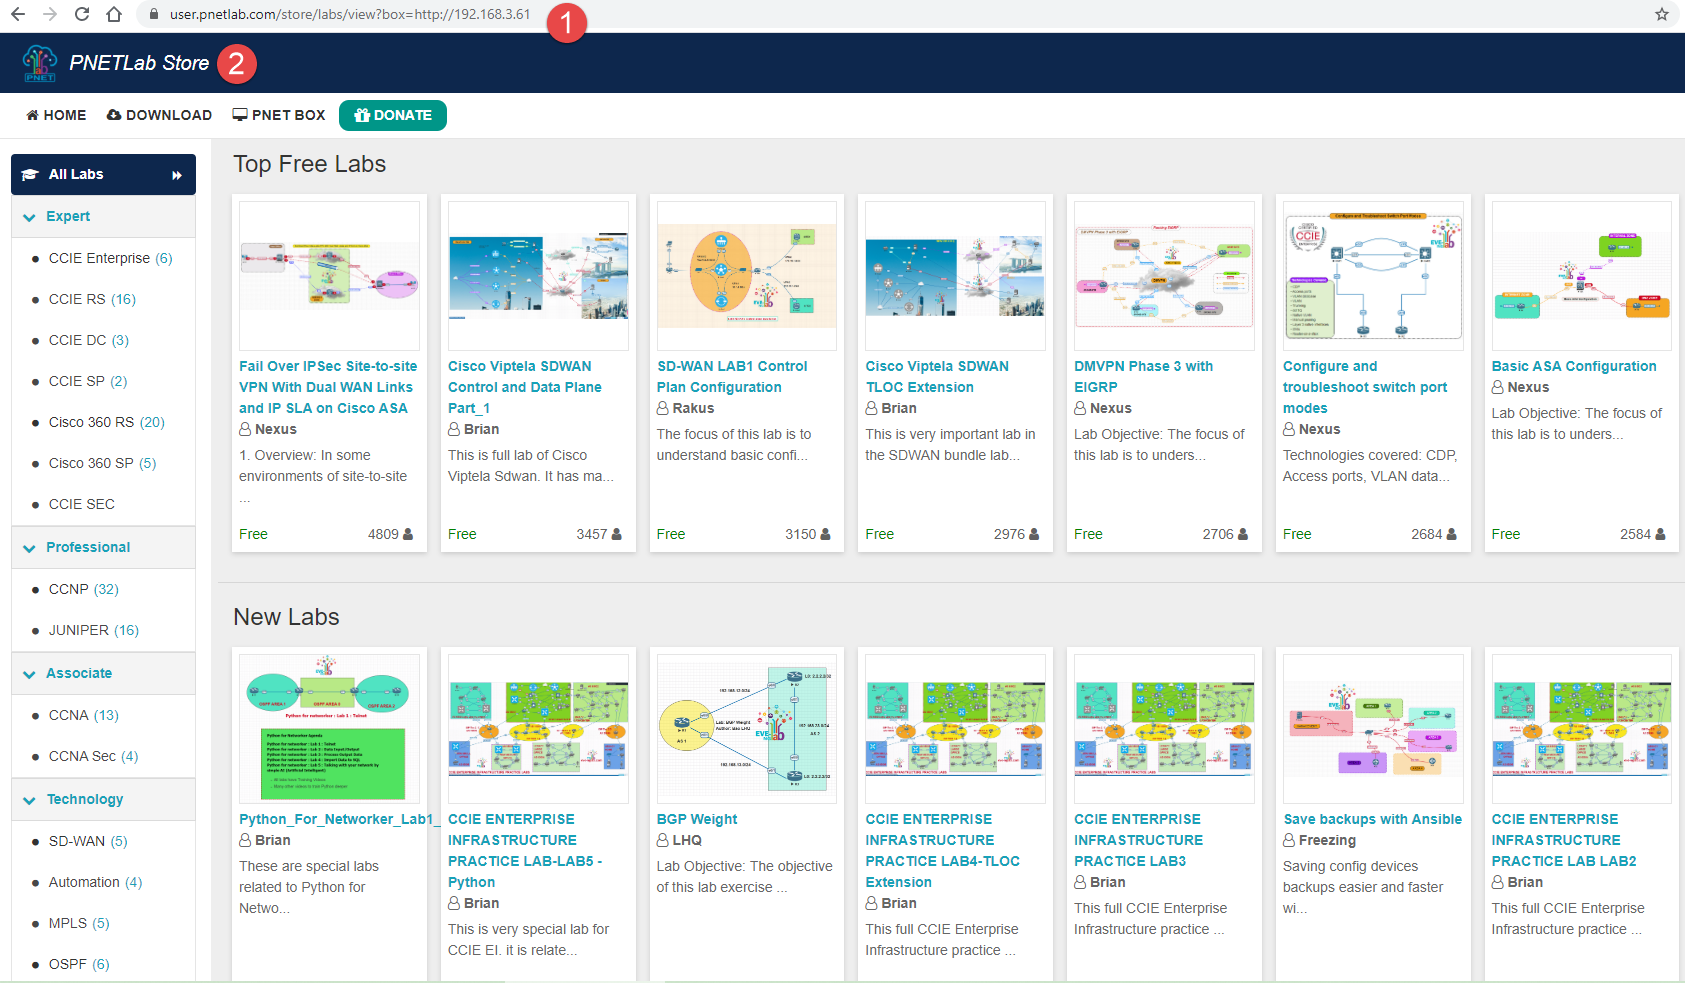
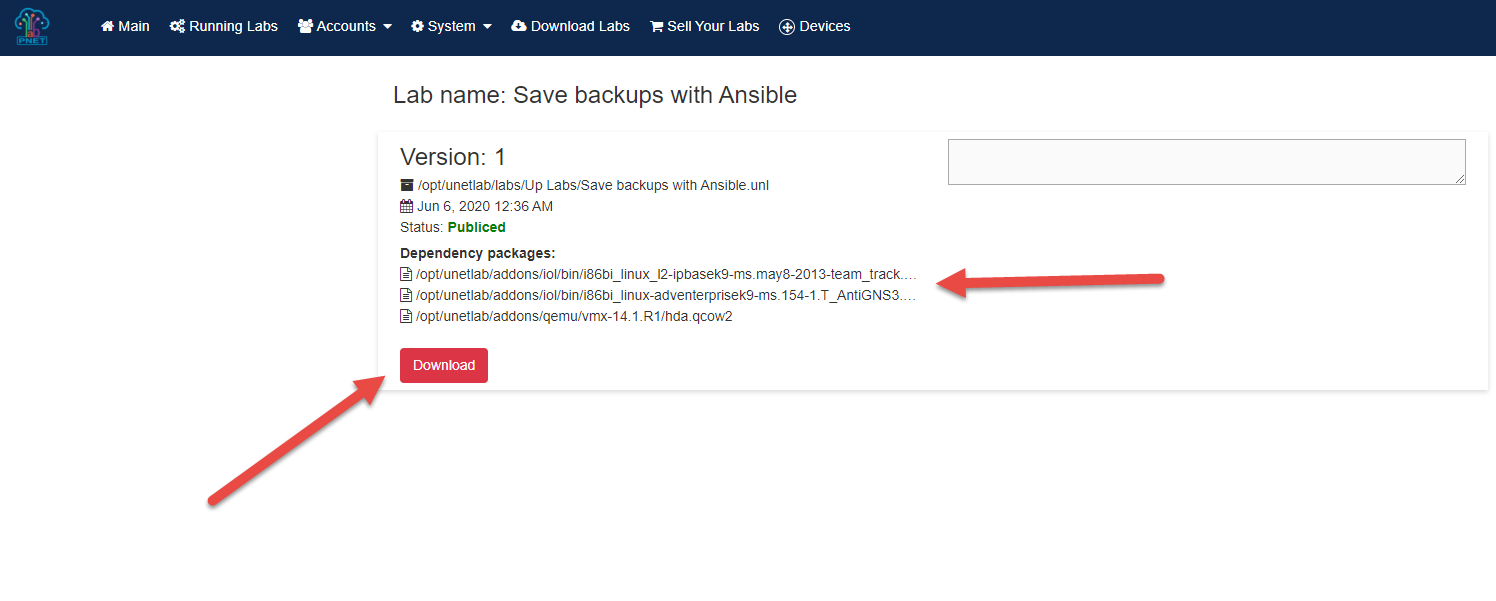
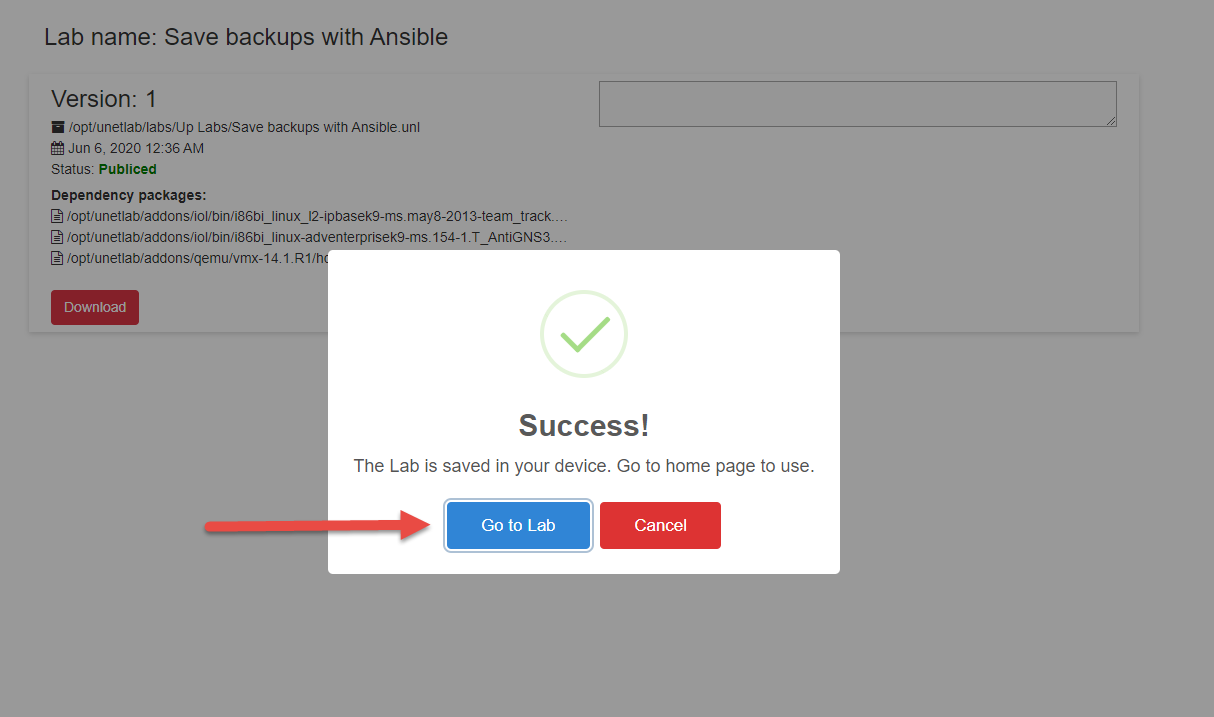
Note: There are a lot of Labs from Store, and All labs are free, when you download a lab, you will get Lab file, workbook and IOS (Go to Step 4 for more detail).
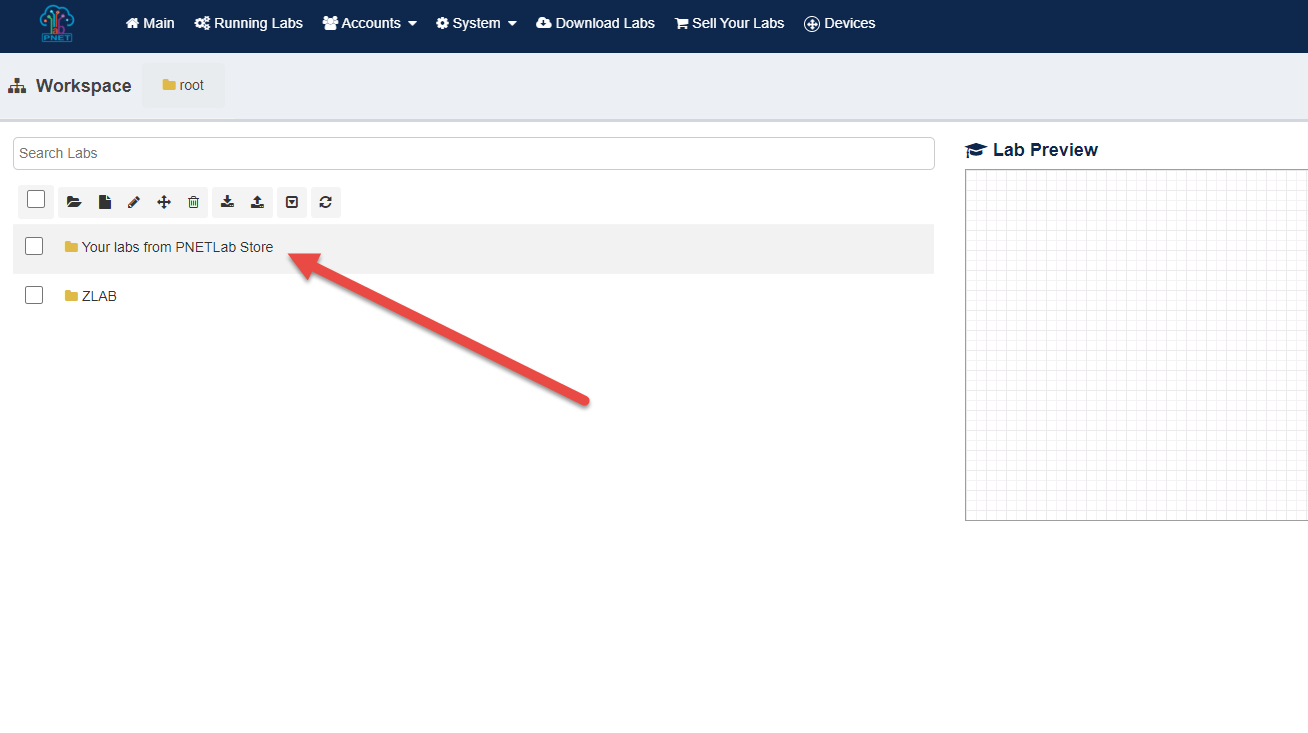
Step 04: Get Lab and Learn
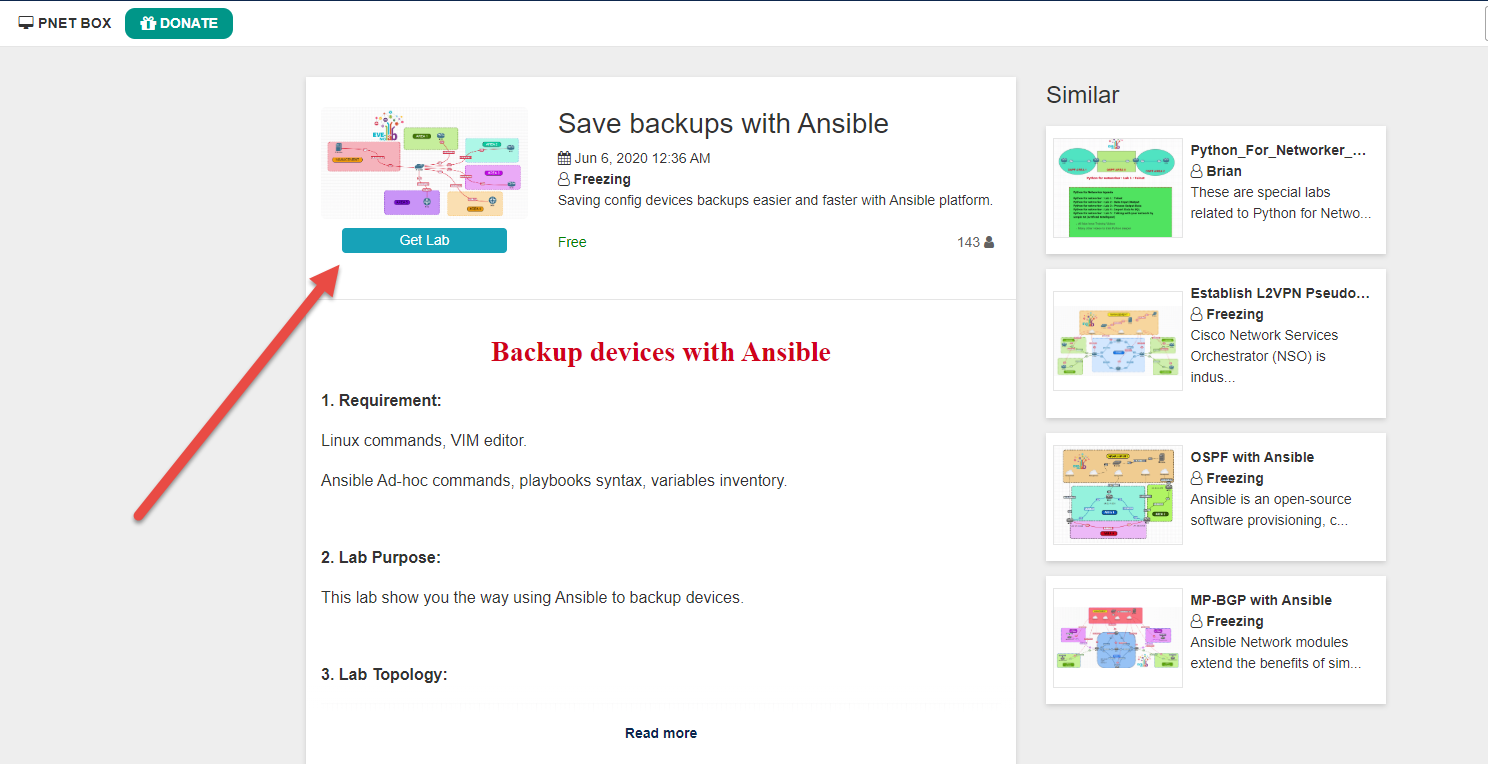

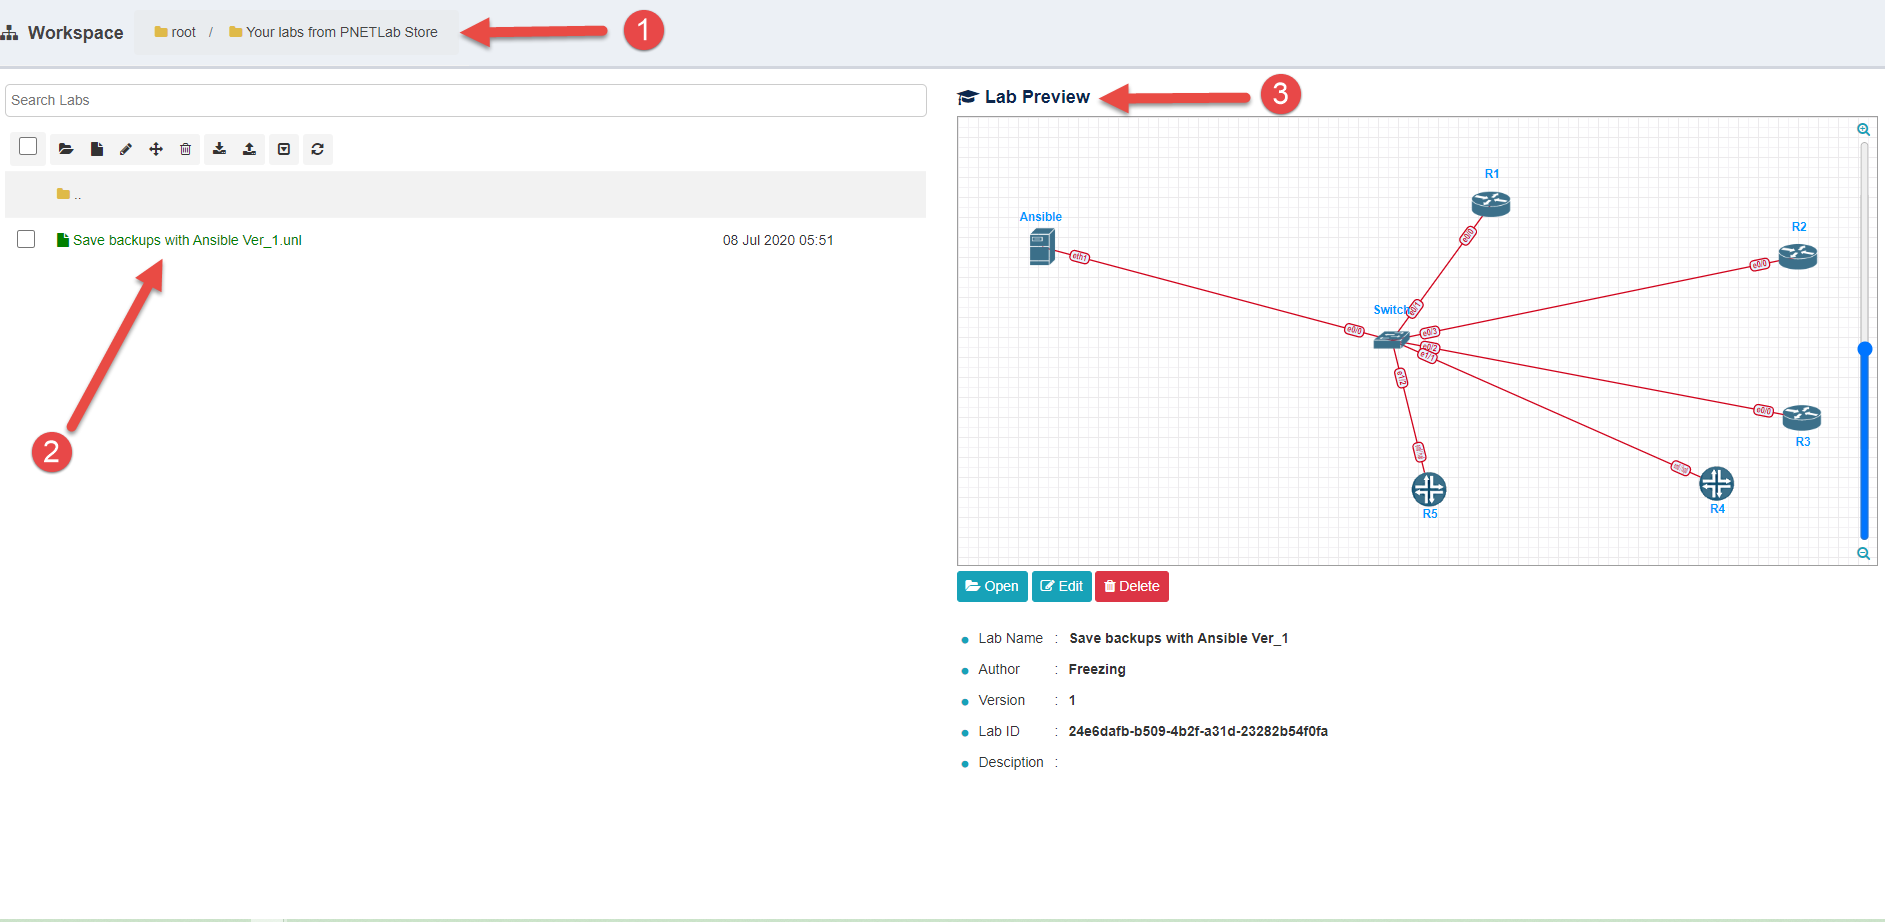
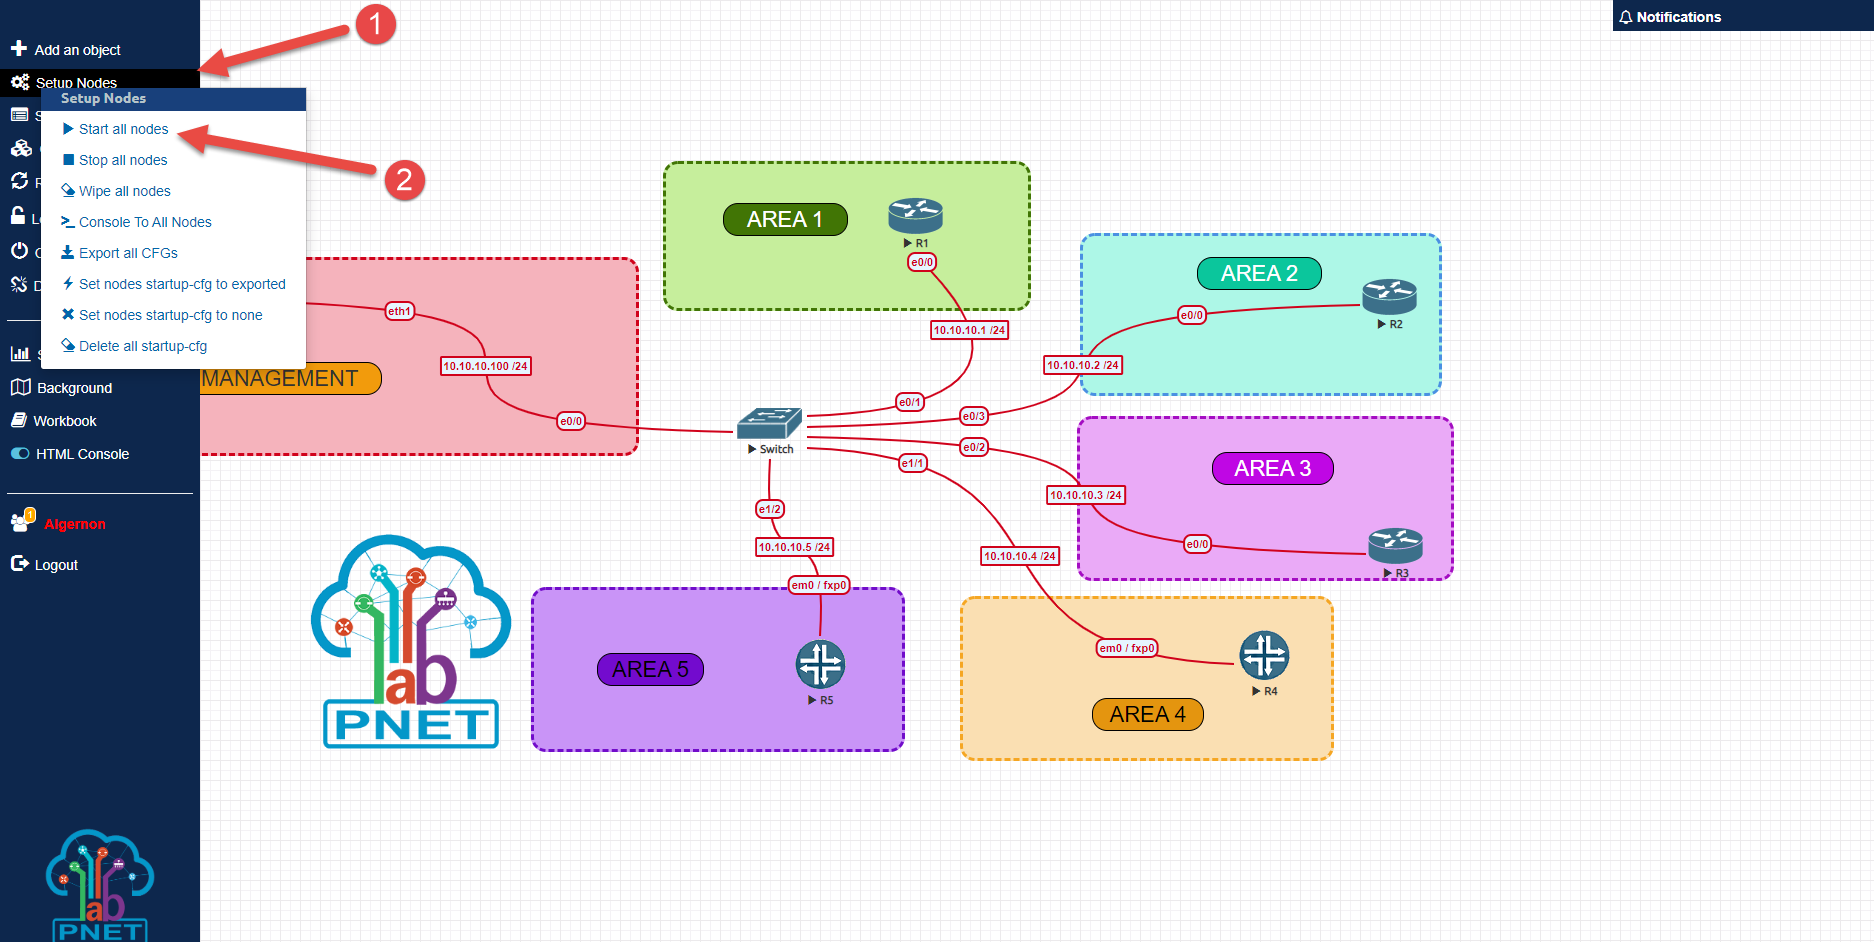
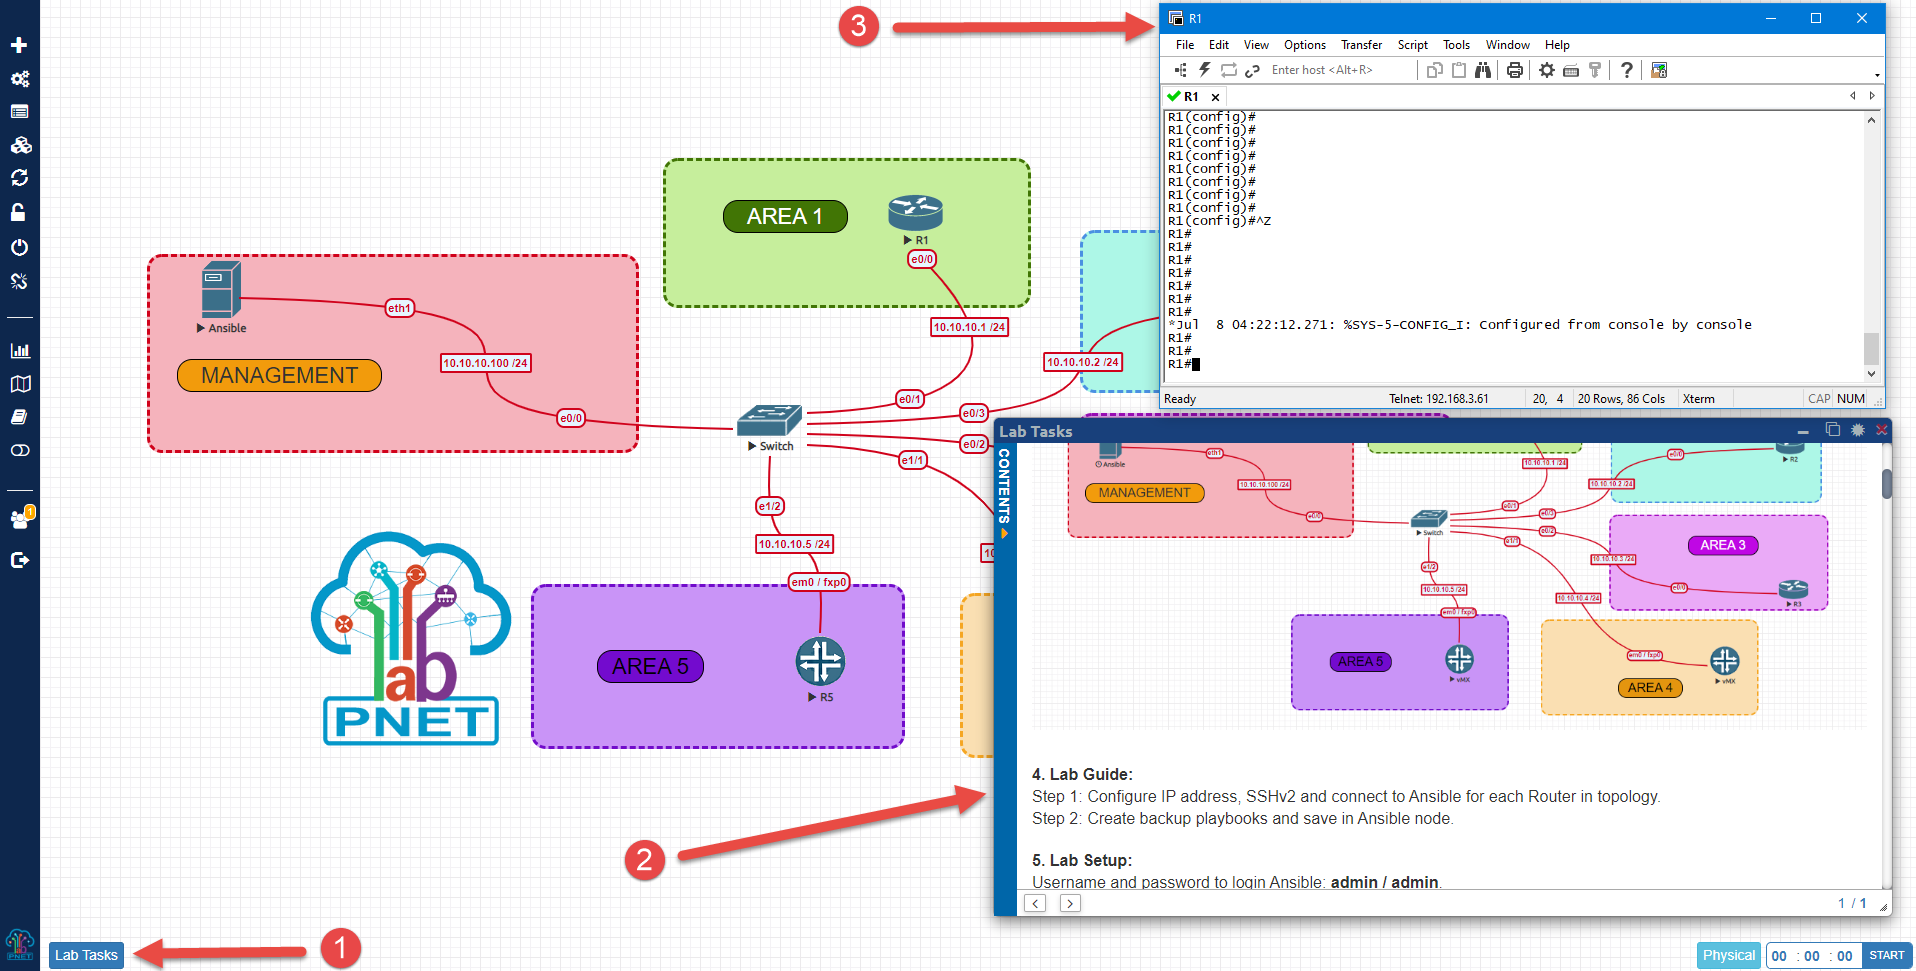
Lab is Simple