The System support 2 Console Types: HTML Console and Default Console. With HTML Console you can console or remote to all device without any external package
HTML is set as default when you login but you can switch to Default Console by click on HTML Console at menu bar.
1. HTML Console
When device is started you can use HTML Console by click on device. Each device will open a new tab in Terminal Window.
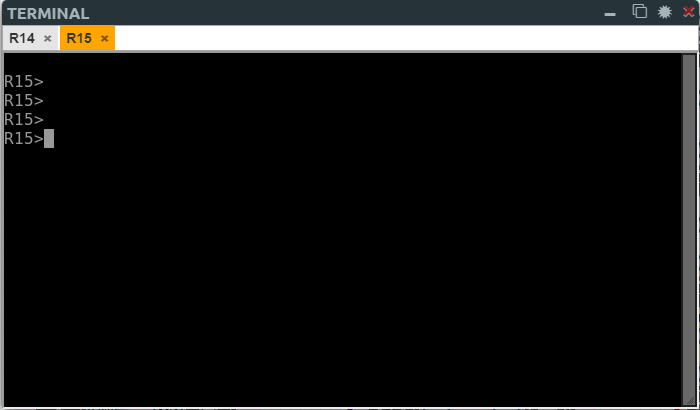
- Change order of tabs by drag and drop to new position.
- You can hide Terminal Console by click on button or click on status button TERMINAL(2)
- Specially, when you click on Button Terminal Window will be opened in a new browser Tab.
You can get it back to Main Workspace by click on TERMINAL(2)
NOTE:
- To Paste to HTML console you can press Shift + Ctrl + Alt then paste to Text box
- To Upload file to HTML console host you can press Shift + Ctrl + Alt then upload file to Share Folder. Then you can find the file in path: thinclient_drives/GUACD/download
2. Default Console
To work with Default Console you need install some external packages bellow.
2.1 Window
Below one can find a Windows client side pack that will install everything necessary for running telnet, vnc, wireshark, rdp applications when working on/building labs on PNETLab includes:
- Wireshark 3.0.6.0 installation
- UltraVNC 1.2.3.1 installation
- putty 0.73 (used as default telnet client)
- plink 0.73 (for wireshark)
- all necessary wrappers
- It will modify windows registry files for proper work
- It will save all the files on the local PC if one would like to modify for example, using SecureCRT instead of default Putty.
- Windows 8 and 10 reg files to support tabbed SecureCRT
- Auto detection of Windows version (7, 8, 10) ( x64 only supported )
Download links:
2.2 Apple OSX Client Side
Below one can find a Apple OSX client side pack that will install everything necessary for running telnet, vnc, wireshark, when working on/building labs on PNETLab It includes:
- Wireshark 3.0.6 installation
- Real VNC installation
- iTerm installation
- telnet binary installation
- all necessary wrappers
Notice
- Before installaing iTerm package , be sure to close iTerm program if it is already installed. This is required for iTerm configuration update.
- Rdp protocol consoles require downloading Microsoft Remote Desktop ( Free ) on App Store
- On the first usage of capture, you will have to confirm host key and to enter PNETLab root password to create and store rsa key for further authentication. When done, close terminal windows and re – launch capture.
Download Link:
2.3 Linux Client Side
Below you can find a client side pack for Linux clients while working on/building labs with PNETLab